SCIM Connection
Bu içerik henüz dilinizde mevcut değil.
SCIM Connection
Заголовок раздела «SCIM Connection»Requirements
Заголовок раздела «Requirements»Before connecting the provisioning client to R-Service we recommend you to explore the mapping possibilities first.
At least two people need to be involved to connect the provisioning client to R-Service:
- the R-Service account owner to retrieve the R-Service connection information
- the administrator of the provisioning client to configure the provisioning client
We recommend that you first setup the connection for your QA account to fine tune the mapping .
R-Service connection information
Заголовок раздела «R-Service connection information»Login to R-Service as the account owner and go to the Settings console. Open the Apps menu and click on the SCIM section. Here you will find your SCIM endpoint and the SCIM access token:
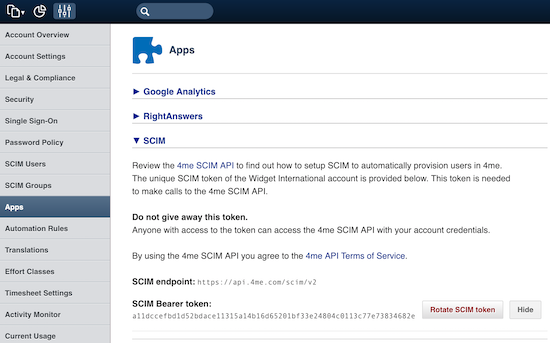
Both values need to be shared with the administrator of the provisioning client.
Important The SCIM access token is confidential and must be shared in a secure way.
Configure provisioning client
Заголовок раздела «Configure provisioning client»The configuration on the provisioning client will be different, of course, for each provisioning client. For some provisioning clients you will find a separate section below with some additional details based on past experience of R-Service customers with these provisioning clients.
When your provisioning client is not listed here, please take the following into consideration.
The
Endpoint
definition
states
that the
Users
and
Groups
resources must be accessible on the following URLs:
https://api.r-service.tech/scimhttps://api.r-service.tech/scim/v2Some provisioning clients automatically append
/scim
or
/scim/v2
to the endpoint, while others don’t. The best way to test this is to first provide
https://api.r-service.tech/scim/v2
as the endpoint, then try
https://api.r-service.tech/scim
and fallback to
https://api.r-service.tech
.
The SCIM access token is a bearer access token . Most provisioning clients default to this type of access token for the SCIM integration and you can simply copy the R-Service SCIM token directly to the provisioning client.
In case the provisioning client requires the full
HTTP Authorization header
prepend the token with
Bearer
as follows:
Bearer 9bf7650e318d370b2447355a3d97ecaf52faa9ebb2a9e511286bb692d65fb3ad
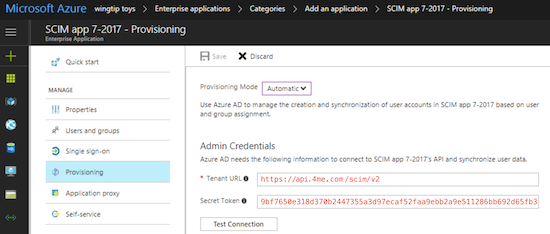
Azure AD
Заголовок раздела «Azure AD»Tenant URL
https://api.r-service.tech/scim/v2
Secret Token
9bf7650e318d370b2447355a3d97ecaf52faa9ebb2a9e511286bb692d65fb3ad
Google SSO
Заголовок раздела «Google SSO»Coming soon.
Once the R-Service SCIM integration is available, the Google team will configure and test the SCIM integration to R-Service. After that you should be able to start quickly by turning on the User Provisioning in Google SSO and by providing the SCIM access token.
Coming soon.
OneLogin
Заголовок раздела «OneLogin»Coming soon.
Rotate SCIM token
Заголовок раздела «Rotate SCIM token»R-Service advises to rotate your SCIM token at least once a year. Login to R-Service as the account owner and go to the
Settings
console. Open the
Apps
menu and click on the
SCIM
section and press the
Rotate SCIM token
button.
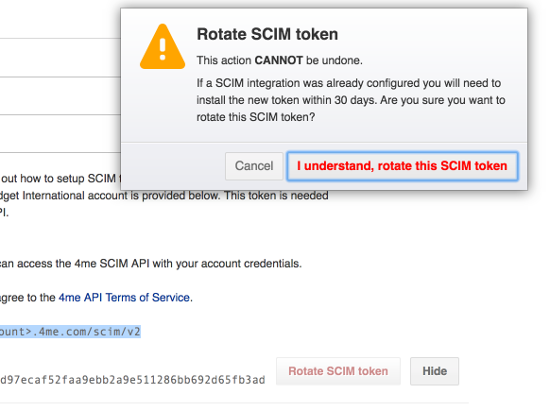
The old SCIM access token will stay valid for another 30 days. This should give you plenty of time to share the new access token with the administrator of the provisioning client (in a secure way).