R-Service Connector
Bu içerik henüz dilinizde mevcut değil.
The R-Service Connector can be used to easily connect to the R-Service GraphQL API , which automatically exposes the data and functionality of R-Service through a single endpoint. This eliminates the need to redeploy the connector in case of API updates. As soon as the API is updated, the R-Service Connector automatically adapts to these updates.
Best Practice: Workflows and Tasks
Заголовок раздела «Best Practice: Workflows and Tasks»To ensure maximum traceability, automation recipes should always be triggered from tasks within workflows in R-Service. A single task triggers a single automation recipe, and the result and output of the recipe are added as a note to the task. When the automation is successful, the automation task is completed. In case of a failure, the automation recipe can activate troubleshooting tasks or simply update the status of the task to
failed
. The manager of the workflow will automatically be notified by R-Service.
Recipe Triggers
Заголовок раздела «Recipe Triggers»The recommended trigger for an automation recipe is using
webhooks
. The recommended Event for the webhook that will trigger the recipe is
automation_rule
. This allows the webhook to be triggered using automation rules in R-Service. Automation rules provide maximum flexibility in determining when the webhook should be triggered and what is included in the webhook payload.
Connector Setup
Заголовок раздела «Connector Setup»The following input fields are mandatory when configuring the R-Service Workato Connector.
- The Event. The webhook’s event type.
- The GraphQL ID of the Webhook. This ID is used to properly route the incoming webhook to the correct recipe.
- The JWT public key. This key is used to validate the incoming webhook content.
Example
Заголовок раздела «Example»This example shows how to create a new recipe in the R-Service Workflow Automator tiggered via an automation rule.
Create a new OAuth Application
Заголовок раздела «Create a new OAuth Application»Open the settings, search for OAuth Applications and create a new application.
The R-Service connector only supports the
client credential
grant type.
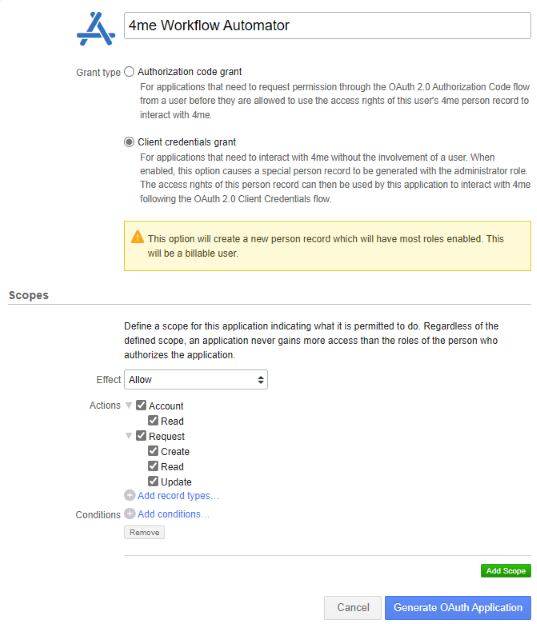
Define the scope and click Generate OAuth Application .
The
client ID
and
client secret
are needed to setup the connection.
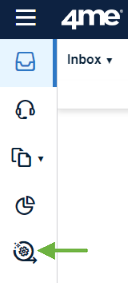
Create a connection and recipe in the R-Service Workflow Automator
Заголовок раздела «Create a connection and recipe in the R-Service Workflow Automator»Open the R-Service Workflow Automator.
If the icon is not visible make sure to assign the
R-Service Workflow Automator specialist role
.
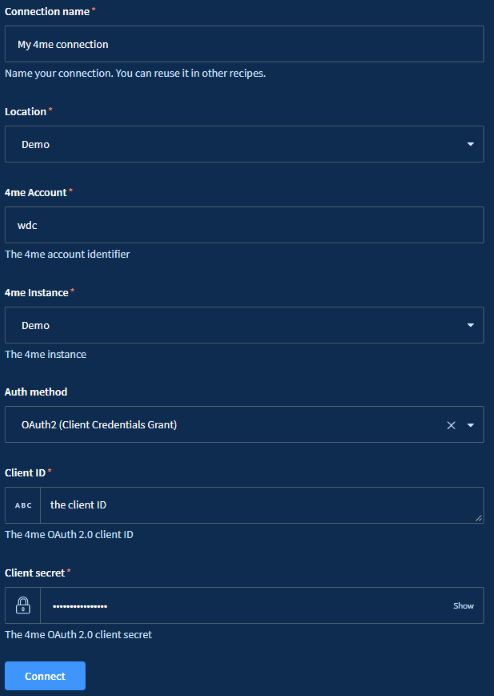
Create a new project and connection.
Search the
R-Service connector
and enter all required information, including the
client ID
and
client secret
.
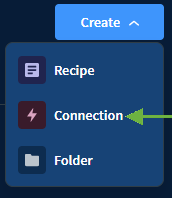
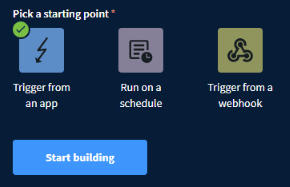
Create a new recipe in the previously created project and choose
Trigger from an app
and click
start building
.
Select the
R-Service connector
and choose the previously created connection.
The R-Service Workflow Automator will generate the webhook URL.
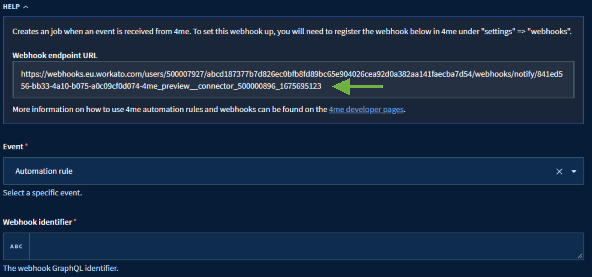
Copy the URL to create a new webhook in R-Service.
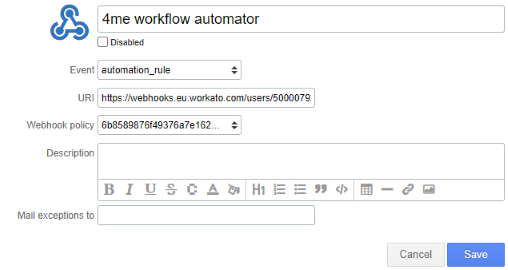
Create a webhook and webhook policy
Заголовок раздела «Create a webhook and webhook policy»Create a new
Webhook Policy
and download the public key.
Create a new
Webhook
and assign the previously created
Webhook Policy
.
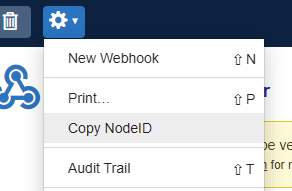
Copy the
Webhook identifier
or
nodeID
.
Update the recipe webhook information
Заголовок раздела «Update the recipe webhook information»In the R-Service Workflow Automator enter the
Webhook identifier
, select the
JWT algorithm
and enter the
Webhook Policy Public Key
or
HMAC secret
.
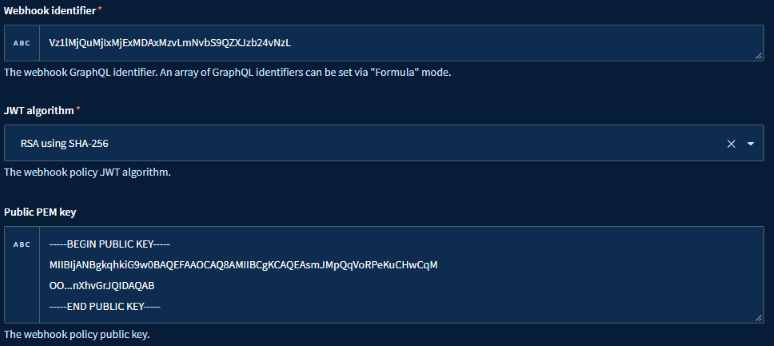
The
Webhook identifier
is used to route any incoming webhook to this recipe.
Define schema
Заголовок раздела «Define schema»It is possible, not required, to describe all properties delivered by the
automation rule
webhook.
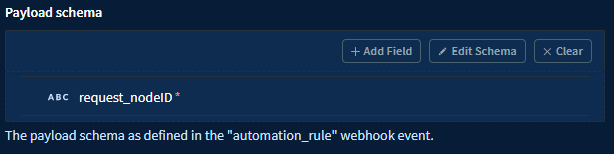
This makes it much easier to reference them later in the recipe.
You can still reference them by name.

Webhook verification
Заголовок раздела «Webhook verification»The R-Service connector will automatically process the webhook verification request .
In the event of any problems, you can take the following steps to manually handle the verification request for the webhook.
- Click on
Testin the R-Service Workflow Automator to test the recipe and wait for the webhook verification to be delivered. - To speed up the verification you can redeliver the verification go to
webhook deliveriesand clickRedeliver.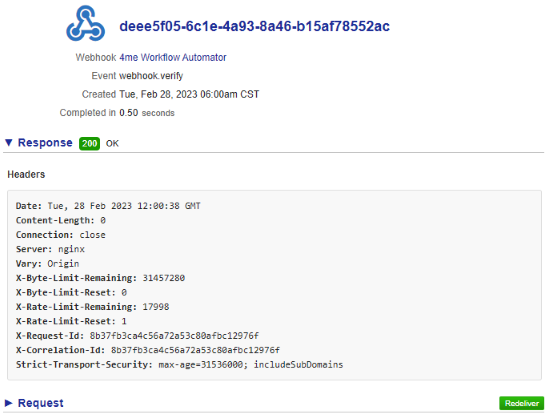
- After the test is finished, navigate to the
outputscreen of the R-Service connector trigger and then expand thepayloadfield. From there, you can copy thecallbackvalue and paste it into a web browser.